At Tax Bandits, we make filing Form 940 easy. Here's how simple it is to e-file Form 940 with TaxPandest.com. From the dashboard, click "Start New Form" and select Form 940 from the menu. Click the orange "Enter Employer" button to choose details from your address book or enter the business information manually. In Part 1, only enter a value if the statement applies to you. In Part 2, enter values to calculate your food attacks before adjustments. Use Part 3 to determine your adjustments, but do not enter a value if it does not apply to you. Use Part 4 to calculate your food attacks and balance due or overpayment. Click "Save and Continue" and finish on page 2. In Part 5, report your food tax liability by quarter only if line 12 is more than five hundred dollars. If not, go to Part 6. In Part 6, please indicate if there's a third-party designee for the business. In Part 7, just enter your name, your title, and the best daytime phone number for you. The e-signature process will take place later, then click "Update and Continue". Now choose your payment method. Available options include EFW, EFTPS, credit card, and check and money order. You will now see a form summary. Make sure everything is correct and click "Next" to continue. The system will check your return for common errors. If no errors are found, click "Next" to continue. It's now time to sign. You can enter a signature pin if you have one, or you can send this form for a signature from a client. When the signature has been added, click "Next". You're almost done. Just choose any additional services, like text notifications or printed copies, and click "Continue". Now simply choose an existing credit card or...
Award-winning PDF software


How to prepare 940 Form 2021
About 940 Form 2021
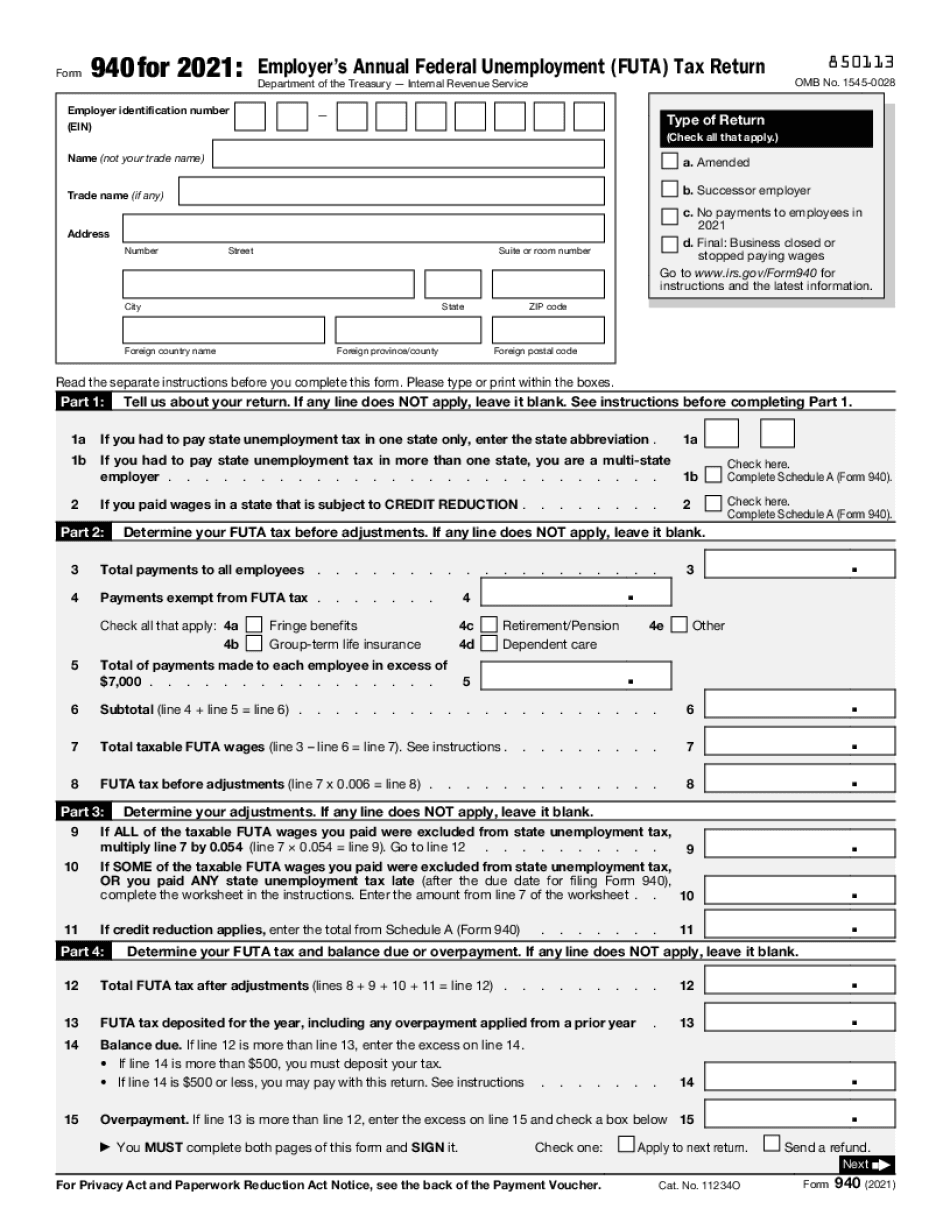
Form 940 is a tax form issued by the Internal Revenue Service (IRS) in the United States. It is specifically used to report and pay unemployment taxes annually. Employers who have paid wages to employees and meet certain requirements are required to file Form 940. The purpose of Form 940 is to calculate the employer's federal unemployment tax liability (FUTA), which helps fund unemployment benefits for workers who have lost their jobs. The form allows employers to report their taxable wages, determine the amount of owed unemployment tax, and reconcile any prior payments made. Employers are generally required to file Form 940 if they meet the following criteria: 1. They have paid wages of $1,500 or more to employees in any calendar quarter during the current or previous year. 2. They have employed one or more individuals as a full-time or part-time worker for at least some part of a day in any 20 or more weeks. However, certain organizations and non-profit employers might be exempt from paying FUTA taxes. Detailed instructions and guidelines are provided by the IRS to determine who needs to file Form 940 and to assist employers in accurately completing the form. It is important for employers to file Form 940 timely and accurately to ensure compliance with tax regulations and avoid penalties or interest charges. The completed form must be filed annually, typically before January 31st of the following year, along with any owed payments.
Get 940 Form 2025 and simplify your day-to-day record management
- Get 940 Form 2021 and start modifying it by clicking on Get Form.
- Start filling out your form and include the details it requires.
- Make the most of our extended modifying toolset that allows you to add notes and make feedback, if required.
- Take a look at form and double-check if the details you filled in is right.
- Quickly correct any error you made when modifying your form or come back to the previous version of your file.
- eSign your form effortlessly by drawing, typing, or capturing a photo of your signature.
- Preserve adjustments by clicking Done and download or send out your form.
- Send your form by email, link-to-fill, fax, or print it.
- Pick Notarize to carry out this task on your form on the internet using our eNotary, if required.
- Securely store your complete papers on your computer.
Editing 940 Form 2025 is an simple and intuitive process that requires no prior training. Find everything you need in a single editor without constantly switching between various solutions. Get more forms, fill out and save them in the format of your choice, and simplify your document management in a single click. Prior to submitting or sending your form, double-check details you provided and easily correct mistakes if required. In case you have questions, contact our Support Team to help you.
Video instructions and help with filling out and completing 940 Form 2025